Gamesmithing: 2D Sandstorm Shader

I recently put out a demo / alpha / early access build of Caravana for the wider world to see. It's been great to see people checking out the game and hearing what they're thinking. It's also a great source of motivation to fix, polish, and improve the current design.
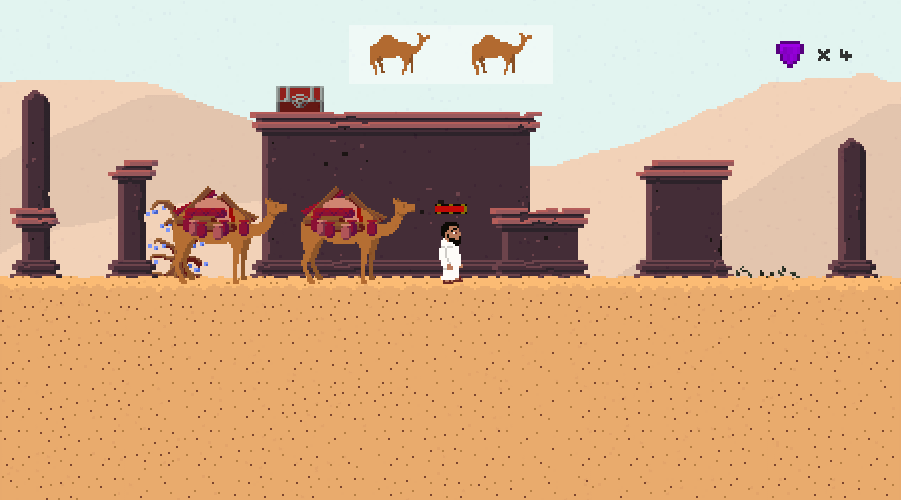
In Caravana, you are protecting your camels as they carry your valuable trade goods across the desert. The initial demo spawns most of the enemies on level creation, so the player encounters the baddies as the player moves forward. The stage is necessarily flat (so the camels can move across it), and the combat seems to lack a needed variety. For instance, the most basic enemy type will simply walk up to the player and swing a stick at 'em, but fighting more than one of these guys at once isn't that interesting right now. All of them approach the player (almost always from the front), clump up, and start swinging.

One way to break up this "frontal focus" on combat is to make sure that enemies aren't always attacking from the front. I've been looking at ways to spawn enemies all around the player's location. During a recent demo night, a playtester suggested having sandstorms appear and spawning enemies inside the sandstorm. I loved the idea, so I set about making a pixelated sandstorm shader. In this Gamesmithing article, I'll be looking at how I did just that.
This will be a screen shader (affecting all pixels on the screen, minus the UI), so I create and attach a simple script to my camera.
[ExecuteInEditMode]
public class CameraPostProcessing : MonoBehaviour
{
    public Material Material;

    void OnRenderImage(RenderTexture source, RenderTexture destination)
    {
        Graphics.Blit(source, destination, Material);
    }
}
Not too much to go over here: Graphics.Blit() will copy the source RenderTexture to the destination after applying Material to it. Material in this case will simply be an empty material with a shader attached. (You should create a new Material and a new Shader to apply to it as well.) ExecuteInEditMode should let the shader run without playing the game. In my case, between the spaghetti-tangle of Cinemachine, PixelPerfectCamera, and a hacked-together set of parallax cameras, it didn't work in edit mode. But! Unity will happily compile and use new shader code during play mode, so you can always live test your shader code.
Shaders can be broken down into vertex shaders and fragment shaders. Since this is applying to the whole screen, we'll only be needing a fragment shader. We can use #pragma vertex vert_img to use the default vertex shader from Unity.
We'll start off with some basic shader code.
Shader "Custom/Sandstorm"
{
    Properties
    {
        _MainTex ("Texture", 2D) = "white" {}
    }
    SubShader
    {
        Pass
        {
            CGPROGRAM
            #pragma vertex vert_img
            #pragma fragment frag
            #include "UnityCG.cginc"

            sampler2D _MainTex;

            float4 frag(v2f_img input) : COLOR
            {
                float4 base = tex2D(_MainTex, input.uv);
                return base;
            }
            ENDCG
        }
    }
}
Congratulations! This shader does nothing! Well, that's if everything is set up correctly. This shader simply takes the input and copies it to the output. If things aren't set up correctly, you'll see a lovely magenta color all over your screen. This is the shader's way of telling you that you missed a semicolon in your code or that something else went wrong somewhere.

Now that we know things are working correctly, we can get to work on the shader part. First we'll create a "random" function.
float rand(float2 pix)
{
    return frac(sin(dot(pix.xy, float2(12.345, 67.89))) * 98765.1234);
}
This function is really pseudo-random, as it will give the same results every game. The dot product of our two vectors (a texture XY coordinate and a pulled-from-a-hat vector) gives us a value between 0.0 and 1.0, depending on the texture coordinate. By taking the sin of this number (or cos, if you have an irrational attachment to specific trigonometry functions) and multiplying that by a large number (again, pulled from a hat), then taking the fractional part thereof, we get something that very much looks like random noise.
To prove it, add the following code to your frag function, right above the return statement.
base = rand(input.uv);This should produce the following still image. Say, if the image isn't moving, does that make it... static? (I'll see myself out.)

Adding a time component will cause our noise to change. This complicated function has a nice property, though. Even though the noise will change, it's not completely random in how it changes. It won't look like true static, with each pixel getting a random value each frame. Pixels flow back and forth between 0 and 1, and this gives an illusion of persistence. To get this effect, change the rand function to the following:
return frac(sin(dot(pix.xy, float2(12.345, 67.89))) * 98765.1234 + _Time.w);
Pretty! But it might still be moving a bit fast for a sandstorm. We can slow down the flow by reducing the _Time.w term. We could hardcode something in here, but it would be better if we added a knob to the shader so that it could be adjusted directly from the Unity Editor.
Add the following line to the Properties subsection, right under _MainTex:
_ParticleSlowness("Particle Slowing Factor", Range(1.0, 1000)) = 15Add a declaration under the #pragmas:
float _ParticleSlowness;And change the rand function one more time:
return frac(sin(dot(pix.xy, float2(12.345, 67.89))) * 98765.1234 + _Time.w / _ParticleSlowness);
Looking good! Now we can change the speed of the flow directly from the editor, anywhere between 1 (normal) and 1000 (barely flowing).
Astute observers may notice a problem. The pixels in this shader are actual pixels, while the "pixels" in my game are actually blocks of upscaled pixels. We can increase the apparent size of the shader pixels so that they line up with the game better. Add the following to the Properties and #pragma sections:
_ParticleSize("Particle Size", Range(1.0, 10.0)) = 1.0
float _ParticleSize;
Then modify the rand function call as follows:
base = rand(floor(input.uv * _ParticleSize * float2(160, 90)));This multiplies the input texture coordinate by my aspect ratio (16:9) multiplied by 10 (just because). The Editor-controlled variable _ParticleSize lets us move from 1 (large and blocky) to 10 (small pixels). We then take the integer component of the resulting float, and that's our new "source texture coordinates". What this code does, in effect, is zoom in on a smaller portion of the source texture coordinates. Multiple adjacent pixels in the source texture will get "floor'ed" together before they go off to our rand function. They'll have the same input to rand, so they'll have the same output. Our final output will appear blockier because of this grouping.

Next, let's change this from black and white to something a bit more appropriate for a desert. We'll add in three color properties and variables. Note that these are just colors I grabbed from my color palette. Adjust as you'd like.
_ColorA("Sand Color A", Color) = (0.95, 0.75, 0.45, 1)
_ColorB("Sand Color B", Color) = (0.9, 0.65, 0.40, 1)
_ColorC("Sand Color C", Color) = (0.5, 0.25, 0.18, 1)

float4 _ColorA;
float4 _ColorB;
float4 _ColorC;
Then add the following line underneath the rand function call:
base = base < 0.33 ? _ColorA : base < 0.66 ? _ColorB : _ColorC;We check if our random value passes a couple of thresholds to decide what color it should be.
A quick note, since I'm pretty new to shaders. I know you're supposed to avoid conditional logic with shaders, since too much branching deprives you of the benefits of GPU parallelization. I think this is okay, since it's a simple assignment, but if you know better please reach out and let me know :) I'll show how to avoid using conditionals with a step function later on, but here I'll leave it be until I hear otherwise. That said, here's what we got:

I like the colors, but it doesn't look very stormy. Let's modify some of the thresholds:
base = base < 0.97 ? _ColorA : base < 0.99 ? _ColorB : _ColorC;By making 97% of the screen our base color and by having the third color be of a strong contrast to our first color, we create the illusion of wind whipping sand particles around. You can play around with the threshold numbers yourself, or even create more properties to expose to the Editor.

We have our sandstorm, but it's a real thick one. We can't see our game beneath it! Let's see how to fade the sandstorm in and out. First, add some more properties and declarations:
_FadeInTime("Fade In Time", Range(0.1, 15.0)) = 5.0
_FadeOutTime("Fade Out Time", Range(0.1, 5.0)) = 1.0
_MaxFade("Maximum Effect Fade", Range(0.0, 1.0)) = 0.95

float _FadeInTime;
float _FadeOutTime;
float _MaxFade;
It works better for my purposes for the sandstorm to come in slowly (warning the player) then leave quickly (let the player fight the new enemies), but you can adjust these numbers as needed. Next, we'll stop overwriting the source texture input that we're getting from the game and store our sandstorm values separately:
float staticNoise = rand(floor(input.uv * _ParticleSize * float2(160, 90)));
float4 sandstorm = staticNoise < 0.97 ? _ColorA : staticNoise < 0.99 ? _ColorB : _ColorC;
Then add the following to the function body:
float fadeTime = fmod(_Time.w, _FadeInTime + _FadeOutTime);
float fadingOut = step(_FadeInTime, fadeTime);
float fadeAmount = (1 - fadingOut) * (fadeTime / _FadeInTime) + (fadingOut) * (1 - (fadeTime - _FadeInTime) / _FadeOutTime);

base = lerp(base, sandstorm, min(fadeAmount, _MaxFade));
Digging into this, we are first calculating how long a fade in / fade out cycle should take, based on our properties, and where we are in that cycle based on the current shader time. After that, we calculate a "fadingOut" variable. The function step returns 0 if the first argument is less than the second argument, and 1 otherwise. Since our sandstorm is only ever fading in or fading out, the variable fadingOut will be 0 if we are fading in and 1 if we are fading out. Then we calculate our fade amount. When we are fading in, we take our fadeTime cycle timer against our fade in time. We multiply this by '1 - fadingOut' so that this term is 0 during our fadeout sequence. Then, we look at our fading out cycle. We subtract our _FadeInTime from fadeTime and divide this by our _FadeOutTime. This only gives a nonzero term during the fade out time because it's multiplied by fadingOut - which is 0 during fade in time. Finally, we reverse the fade out term by subtracting it from 1. This is because we are going from fully faded in (1) to fully faded out (0) instead of the other way around.
Phew, what a mouthful! This is how you can use conditionals without using conditionals in shaders - use a step function to multiply terms by 1 (if true) or 0 (if false), then add the terms together. It's certainly more convoluted, which is why I'm hoping my earlier conditional usage is legit. That line of code is much easier to understand.
Finally, we take our base texture input and lerp it against the sandstorm effect. When I allowed the shader to lerp fully to the sandstorm, there was an apparent "flash" when the game (the input source texture) disappeared completely under the shader before reappearing again. To prevent that, I'm capping the maximum fade amount with another editor property.
And here's the final product!

For more information on shaders and shader language, I would recommend the excellent Book of Shaders. They've set up a shader REPL in the browser that makes following along with their lessons much easier.
Here's the source code, released under an MIT license. I liked how The Book of Shaders did their tutorials, so I'm leaving the different steps of the tutorial as commented-out code. Just uncomment as you follow along.
Shader "Custom/Sandstorm"
{
    Properties
    {
        _MainTex ("Texture", 2D) = "white" {}
        //_ParticleSize("Particle Size", Range(1.0, 10.0)) = 2.0
        //_ParticleSlowness("Particle Slowing Factor", Range(1.0, 1000)) = 1000
        //_ColorA("Sand Color A", Color) = (0.95, 0.75, 0.45, 1)
        //_ColorB("Sand Color B", Color) = (0.9, 0.65, 0.40, 1)
        //_ColorC("Sand Color C", Color) = (0.5, 0.25, 0.18, 1)
        //
        //_FadeInTime("Fade In Time", Range(0.1, 15.0)) = 5.0
        //_FadeOutTime("Fade Out Time", Range(0.1, 5.0)) = 1.0
        //_MaxFade("Maximum Effect Fade", Range(0.0, 1.0)) = 0.95            // Causes an apparent flash when the fade goes all the way to 1.

    }
    SubShader
    {
        Pass
        {
            CGPROGRAM
            #pragma vertex vert_img
            #pragma fragment frag
            #include "UnityCG.cginc"

            sampler2D _MainTex;
            //float _ParticleSlowness;
            //float _ParticleSize;
            //float4 _ColorA;
            //float4 _ColorB;
            //float4 _ColorC;
            //
            //float _FadeInTime;
            //float _FadeOutTime;
            //float _MaxFade;

            // float rand(float2 pix)
            // {
            //       return frac(sin(dot(pix.xy, float2(12.345, 67.89))) * 98765.1234);
            // }
            //float rand(float2 pix)
            //{
            //       return frac(sin(dot(pix.xy, float2(12.345, 67.89))) * 98765.1234 + _Time.w);
            //}
            //float rand(float2 pix)
            //{
            //    return frac(sin(dot(pix.xy, float2(12.345, 67.89))) * 98765.1234 + _Time.w / _ParticleSlowness);
            //}

            float4 frag(v2f_img input) : COLOR
            {
                float4 base = tex2D(_MainTex, input.uv);

                //base = rand(input.uv);
                //base = rand(floor(input.uv * _ParticleSize * float2(160, 90)));

                //base = base < 0.33 ? _ColorA : base < 0.66 ? _ColorB : _ColorC;
                //base = base < 0.97 ? _ColorA : base < 0.99 ? _ColorB : _ColorC;

                //float staticNoise = rand(floor(input.uv * _ParticleSize * float2(160, 90)));
                //float4 sandstorm = staticNoise < 0.97 ? _ColorA : staticNoise < 0.99 ? _ColorB : _ColorC;
                //
                //float fadeTime = fmod(_Time.w, _FadeInTime + _FadeOutTime);        // between 0, _TimeIn, and _TimeIn + _TimeOut
                //float fadingOut = step(_FadeInTime, fadeTime);                    // 0 if fading in, 1 if fading out
                //float fadeAmount = (1 - fadingOut) * (fadeTime / _FadeInTime)
                //           + (fadingOut) * (1 - (fadeTime - _FadeInTime) / _FadeOutTime);
                //
                //base = lerp(base, sandstorm, min(fadeAmount, _MaxFade));

                return base;
            }
            ENDCG
        }
    }
}